In my previous article, we set up an Amazon Web Service (AWS) account and a billing alert using the root account. However, the root user is a highly privileged account with unlimited access to all AWS resources; therefore, AWS recommends not using it for daily activities. Instead, we will set up an Identity and Access Management (IAM) user account for these activities.
In this article, we will:
- set up multifactor authentication (MFA) for the root user account;
- delete root user access keys;
- create a user group;
- create an IAM User.
Setup MFA for the Root account
By default, only the username and password (single sign-on) are required to access the AWS resources. This section will set up multifactor authentication (MFA) for the root account to provide an additional layer of security for our sign-ins.
Visit the Security Credentials page https://console.aws.amazon.com/iam/home#/security_credentials/ and sign in with your root credentials.
Expand the Multifactor Authentication section and select Activate MFA.

Choose a Virtual MFA device to use an authenticator app such as Authy or Microsoft Authenticator. You can find a list of supported MFA devices here.

Select Show QR on the setup page and scan the revealed QR code with the camera on your device.

Next, enter two consecutive MFA codes from your MFA app (there may be a 30 seconds wait time). Then select Assign MFA.

We have successfully set up MFA for our root user account.

Which would be required for each sign-in.

Delete root user access keys
There are two ways to connect to AWS resources;
- access to the AWS Management Console with sign-in credentials;
- programmatic access to the AWS Command Line Interface (AWS CLI) and AWS Application Programming Interface (AWS API).
We accessed the management console with our login credentials earlier. However, for programmatic access, AWS generates a set of access keys (access key IDs and secret access keys) used with the AWS CLI and AWS API.
Visit the Security Credentials page https://console.aws.amazon.com/iam/home#/security_credentials/ and sign in with your root credentials.
Expand Access keys

We do not have an access key for the root user. Therefore, we don’t need to perform any action.
Finally, our root user has passed AWS security recommendations.

Create a User Group
Identity and Access Management (IAM) is a web service that enables access management to AWS accounts and resources. A user group provides a convenient way of assigning policies to multiple users at a time.
Thus, we will create a user group, with administrative access and then add users to the group.
Sign in to the AWS console using the root account and search for IAM in the search bar. Select the first option.

Select Users Groups under Access Management and choose Create group.

GIve your group a descriptive name

In the Attach permissions policies section, search for Administrator in the search bar and select AdministratorAccess.

The AdministratorAccess policy has full access to AWS services on the description pane on the description pane.
Let’s take a look at the permissions JSON format.

“Version”: “2012-10-17” stands for the current version of the policy language which AWS sets;
“Statement” is the main element of a policy and is required;
“Effect”: “Allow” specifies that the statement results in an allow;
“Action”: “*” denotes that all actions are allowed;
“Resource”: “*” specifies that group members have full access to all AWS resources.
On the Attach permissions policies pane, select Create Group

We have successfully created a user group.

Create an IAM User
An IAM user represents a person or service that interacts with AWS.
On the IAM page, select Users under Access Management and Add users

Enter a username

Under Select AWS access type, choose Password and select Custom password. Select Next

On the Set permissions page, choose the group we created earlier and select Next

Skip the Tags page and select Next

Review the User details and Select Create user
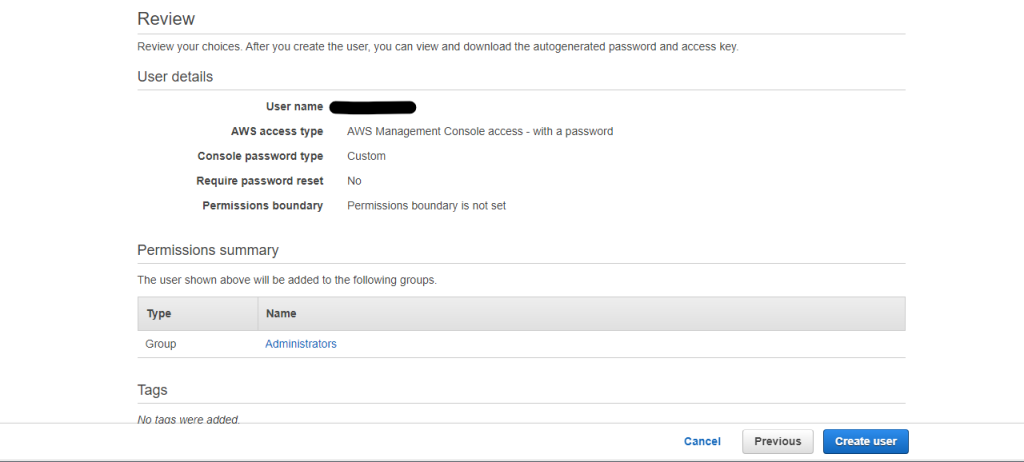
We have successfully created an IAM user with administrative access.

We can also choose to have the login credentials sent to our mail.
CONCLUSION
In this article, we set up MFA for our root account and deleted access keys associated with it. We also created a user group with administrative access and set up an IAM user for daily activities on our cloud account.